Friday, September 19, 2014

Brightening up the kitchen

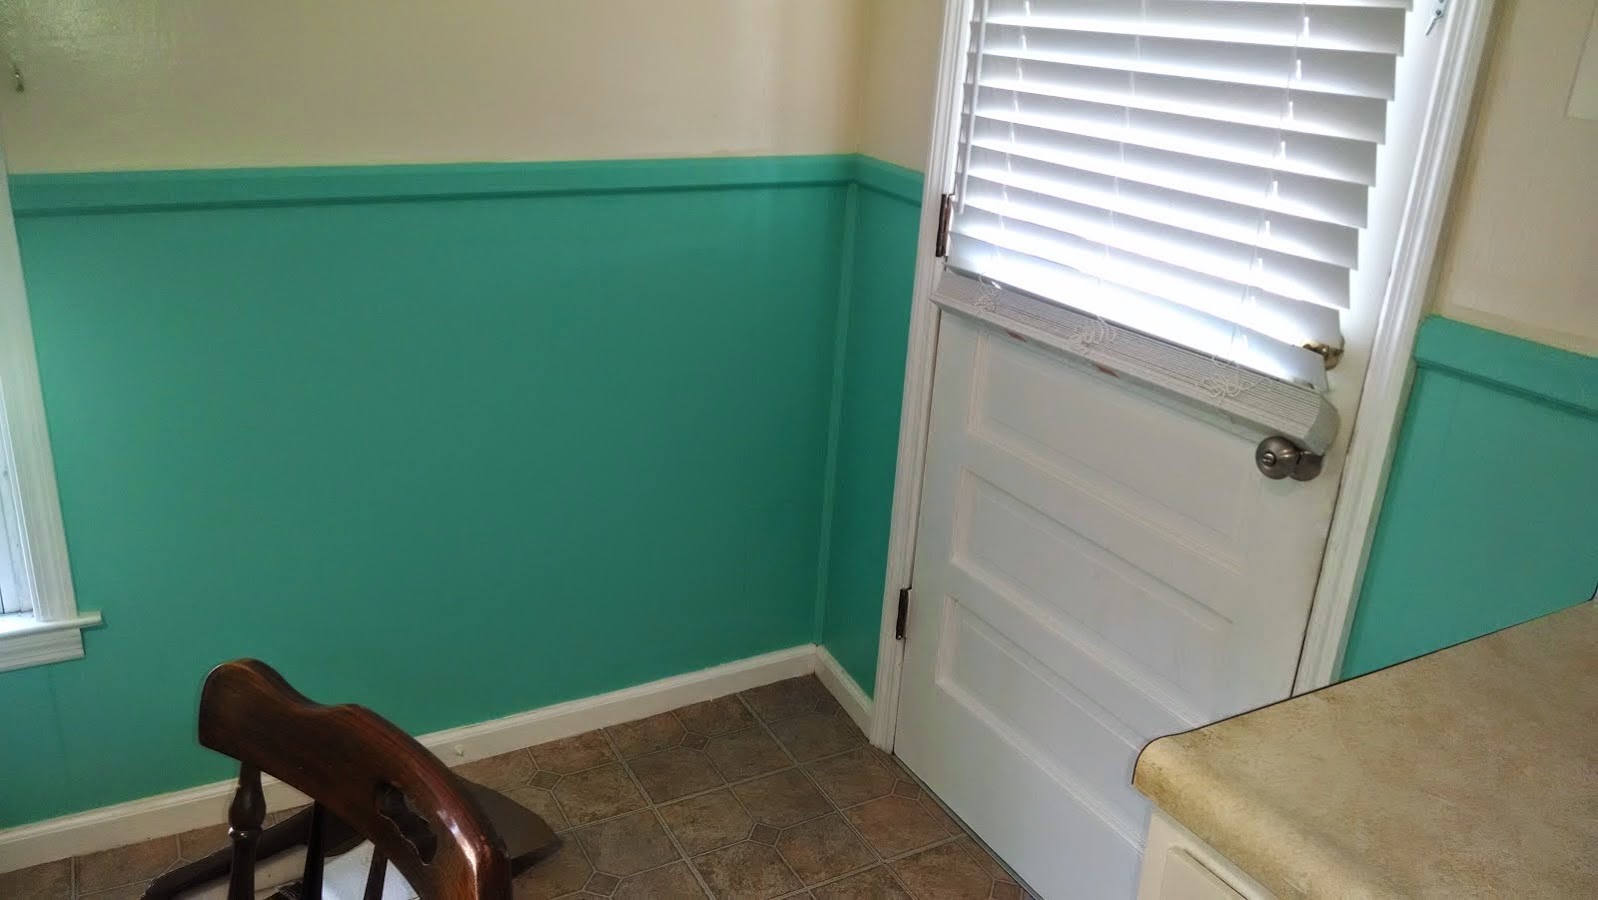
Okay, so as you know from the previous posts, I finally got my turquoise kitchen with white cabinets. I love these colors because they are so easy to decorate! I wanted a small curtain for my kitchen window above my sink. I didn't want to pay a lot of money for one so I decided to make my own. Only one iron burn later and it is done! I don't have much $$$ in the project either so I strongly urge you to make your own if your heart desires!

Materials & costs:

Tension rode $2 - Walmart
Fabric - $3.00 - Jo Ann Fabrics, I bought clearanced fabric, of course :)
Iron on adhesive hemming tape - $3.00 with coupon at Michaels

So, as you can see, a total of $8.00 and I have a custom window curtain. The best part? I was able to pick whatever fabric I wanted and didn't have to rely on specific prints found at the store.


First, I had to measure the window so I could purchase enough fabric. Once you have measured your window, add 2-3 inches onto all the sides because you'll need to have extra fabric to hem up your sides. Cut your fabric to your desired length.


Next, fold over the top of the fabric, leave enough room for the tension rod to slide into the hole after it has been hemmed. Now, if you're like me and too lazy to get out the sewing machine for a small project, you can use iron on adhesive hemming tape. This was my first time ever using it and I loved it. You just place the tape along the inside of the folded fabric. Simple! Then you iron over the fabric, holding it for about 3 seconds before moving it to ensure the adhesive holds. I hemmed the sides first, then the bottom, then the top to ensure I had enough fabric.

As mentioned above, I have $8 invested in this project and it took about 10 minutes. However, I did burn myself when reaching across the table for my iron on adhesive hemming tape. Oops.


Until next time, stay classy :)


Next blog: Fall Owl Wreath


Monday, July 28, 2014

Reupholstering!


My husband and I have been looking for nice dining room furniture. We have found plenty but the problem is....we don't want to pay the high prices for it! The prices on furniture are ridiculously high. So we decided to find chairs we could refinish. We found 6 chairs are the Re-Store in Huntington. If you haven't checked out this place, you should. This is also where we found my antique typewriter desk that Seth refinished.

We found the chairs and they were in great condition, other than the hideously colored and stained fabric. The chairs are solid wood which means we can stain them later if need be. In the meantime, we decided to reupholster the chairs using fabric we found on sale at Hobby Lobby.
Our dog Polly decided to photobomb the picture.
As you can clearly see in the picture above, gross stains. 

Reupholstering the chairs was simple. We went to Hobby Lobby and picked out the perfect fabric after measuring the chairs. We then cut the fabric to fit on the chairs, leaving extra to staple onto the cushion/wood bottom. We flipped the chairs over and used a screw driver to take out the screws holding the fabric and chair cushion on. 


We didn't remove the old fabric. We left it on there; no need to waste your time pulling out staples when it isn't necessary. We wrapped the fabric around the cushion, pulling tightly before stapling it down using a staple gun.


After stapling it, we popped the cushion back into the seat frame and screwed it back together. 


The chairs and fabric match the dining room color scheme and hardwood floors perfectly. Seth is going to make a dining room table to match. We can make the table for a lot cheaper than we could buy one. Also, isn't it better to have something custom made? I think so.

In the meantime, we are purchased a table from the Re-Store in Huntington as well. Our goal is to sand it and stain it. Pictures of that project will be posted later. The table will work until we can build our own.


Finished project :)

The dining room is not finished yet so stay tuned!


Friday, July 18, 2014

Exploring the world of flea markets and antique shops

Over the past week or so I have been trying to pick up pieces here and there to decorate our home. I want to decorate my house but I want to do it as cheaply as possible because I am a frugal type of gal. Since my husband and I bought a huge house, I feel overwhelmed to get it all decorated. However, once I stepped back and realized I need to take it one room at a time, I discovered I felt much more comfortable with the task. Plus, it is loads of fun!

I found the following items at the flea market in Milton, WV. My friend (shout out to Jessie!) and I went flea market shopping last Friday. Unfortunately, we discovered most shops aren't open during the week :( A variety of closed shops didn't deter me from finding a few cute items for the home, however.

The first item discovered was the set of 3 copper plated canisters. These were found in one of the many primitive stores featured at the Milton Flea Market. I have been looking everywhere for adorable canisters. I have plain silver ones but I wanted something to help tie the vintage colors in my kitchen together. These look great paired with the turquoise in my kitchen!


The next item discovered was an adorable turquoise magazine rack. This was found in yet another primitive booth at the flea market. I am going to use this in the kitchen to store cook books and cooking magazines. I'm not sure where I am going to station it but as of right now, it looks cute in the corner!


The final item I found at the Milton Flea Market was this adorable "Old Glory" sign. It is made out of half of a table leaf. It has two metal stars on it that pop. We have a building out back and decided it would look nice there. When washing dishes, you can see it out of the kitchen window. Adorable.


This item, I found when perusing local antique shops in my neck of the woods. I love to find anything vintage Marshall possible. I am starting quite the collection. I was browsing in this shop and noticed a price tag that said "jug lamp." I had never seen a jug lamp before so I decided to move items out of the way and discovered a vintage Marshall lamp. SCORE! I had to have it. Of course, I haggled the price down some :) The lamp shade needs replaced; I'm thinking a kelly green lamp shade :) 


That was the end of my shopping excursion. However, I do regret not scooping this guy up when given the chance. 


I'm joking. Kind of. This would have been an excellent conversation starter and it is reminiscent of a Seinfeld episode. If you're a true fan, you'll know the exact one I am eluding to.  

After shopping, we had to have our weekly girls' craft night session. I discovered that much to my dismay, I didn't have a cute wreath to hang on my door. I made a 4th of July one but seeing as it never made it out of the trunk of my car, it never made it on to the door. Whoops. Oh well, there is always next year ;) So I decided to make a summery wreath to welcome visitors into my home. All the flowers and the cute bird came from the dollar store. I stole this wreath from Jessie so all and all, I had about $8.00 in this wreath total. I owe her $4 for the wreath so we will call it an even $12 in the wreath. Per a friend's suggestion on Facebook, I may be adding a nest for the bird. I think that would be a nice touch.


Sunday, July 13, 2014

Pool and Money Pits :)


Ever heard the saying, "a pool is like a large hole in your yard that you just throw money into?" Yeah, well, it is kind of accurate. When we bought the house, we were not privy to the issues we were going to have of the pool. The pool was not properly winterized so let's just say it was gross. The previous owners had slung a tarp on it; not an actual pool cover! On top of the tarp, was water a swamp and mosquitoes galore. Our first step was to drain the nasty water. We did this with a sump pump. However, the hose to the sump pump did not want to stay in the pool so we tried to secure it with a cinder block. My mother-in-law and I are in the kitchen trying to square away the shelf liner (see previous post on my hatred of shelf liner) when I notice that I can no longer see the sump pump hose. I run outside to see that it has fallen in the pool and for at least an hour, it has been doing nothing but circulating the already disgusting water in the pool swamp. 


Okay, so now we have all of the water out of the pool, except for the small amount suggested to leave in by other smarter pool owners than ourselves. Now, we have all this NASTY, NASTY, NASTY junk on the bottom of the pool. Junk including: algae, mud, rocks, and even a wrapper or two (what?!?). How in the world do we get the bottom of the pool clean? We are told to scrub and shock the heck out of it. Okay..... So my husband gets in it and begins to scrub away. Yes, that is right! My husband, the once germaphobe gets inside this nastiness (albeit with his socks on) and begins to scrub away and start sucking the nastiness out with a Shop-Vac. The story of my mother in law and I trying to assemble the Shop-Vac is for another day. So as my husband is sucking out the nastiness of this pool swamp, he begins to see these red bugs swimming in the pool. He asks me to Google it and my brother in law discovers that they are blood larva. Now while that sounds very ominous, they were not dangerous to humans. They are related to mosquitoes but they only eat algae. Thank goodness. However, as you can see from the picture above, it does not look like they were doing a very good job.

All right. We have all most of the stuff sucked out of the pool. Now, we have to fill it. Yes, folks, that is right. Even with it looking disgusting, we now have to fill the entire pool to see if the pump works. Now, this is a huge gamble because if the pump and filter do not work, we have to replace that ($$$$$) so we were taking a giant leap of faith to see if all the mechanics of the pool worked. So we fill the pool and this is what it looked like once filled:


It looks like I went to the Ohio River, scooped it up and dumped it into a pool in my backyard. Okay, so now it is filling up. We check the pump. Good news! The pump works. However, the filter part of the pump has a plastic lid that must stay on but guess what? It's broken! Okay, not a big deal, we will replace it. For a whopping $40! A PLASTIC LID!!!! Okay. We purchased it. We think we are in business. Now we notice that there is rust along the frame where the return box is. The return box is moving away from the frame which is causing the water to leak out of the pool. All right. Now we need to fix it. 


So my husband and his uncle devise a plan to fix the rusted area. They purchase a piece of sheet metal and cut out a new hole for the return box. They secure it and voila, it is fixed. Then they use sealant to secure the area and make sure no leaks occur. Now this has all been fixed. The frame and liner are secure. We start to get a closer look at the hoses and realize they need to be replaced because the elbows and other areas are leaking. We go to Lowes for the 189th time in two days and buy the pieces needed for the repair. All that is secure. Starting to see a pattern? Oh I forgot to mention that we had to drain half the pool (yes, after filling the whole flippin' thing up) in order to pull back the pool liner and fix the rusted area! Now, we refill the pool. We bought tons of shock. We begin to shock the pool while still sucking out the nastiness. All the time we are vacuuming out the pool, we have to have new water being put into the pool. $$$$$$$$$$$$!!!! 

Within 15 minutes of putting the shock into the pool and vacuuming it out, our green, swampy water begins to turn a cloudy blue. YAY! Progress! By day two or three, I am able to put my feet in! PROGRESS again!!


Within a week, all our hard work began to pay off. It took us a total of 3 weeks to get it up and working and crystal clear but it was well worth the wait. 


Needless to say, I have been in this pool almost every day. It was worth the trouble but I am still scared to see the water bill. I hope I'm not home that day ;)

Until next time.....stay classy :) 


Friday, June 27, 2014

Moving on Up....


So after four long years after paying off debt, saving, and hunting for the perfect home, my husband and I finally found it. We closed on May 30th and have been working hard over the past couple weeks to make it our home. Me, being the perfectionist, wants everything to be done quickly but I have had to step by and let reality hit me in the face and realize that we have the rest of our lives to make the house perfect (or as close to it as possible).


My recent projects have included the kitchen and downstairs bathroom. I want to go on record saying I hate shelf liner. I hate it with a fiery passion. Yes, it is beautiful and yes, I wanted it very badly but it was not "easy liner" as described on the packaging.


I was not anticipating how many cabinets and drawers I was going to have to do either. In our old kitchen, we had very limited storage. Now, we have a lot more (I actually have empty cabinets for the time being...can you believe it?!?). Two days later, I still did not have the shelf liner finished. It kept causing problems like not sticking or sticking to me or I ran out (three times). Whoever replaced the cabinets in the kitchen put the shelves upside down (cannot be easily fixed) so the grainy part is on the top and the smoother part is on the bottom. This proves very difficult when trying to stick shelf liner onto the shelf. However, finally, after a few tears of frustration, I gave in and got the rubber kind (in a brown to match, of course) and it has worked thus far. In conclusion, I dislike shelf liner very much and I need to do it in my closets and I am just not going to fool with it right now.


So then begins my mission of painting. I knew exactly what color I wanted in my kitchen. I wanted a turquoise/teal color and I am happy to say it turned out great. I am going to use coral accents in it.


Before
Before


After

I should have taken a picture of the whole kitchen but I forgot and I don't feel like getting up to do so right now. Just trust me...the color is great.

Until next time.....


Friday, June 6, 2014

School's Out....for two months


Somehow my summer break keeps shrinking each and every year. My last day or school was May 30th and I return on August 1st! I can hardly believe it. It is already the first week of June; time is flying. This school year taught me a few things such as:

  • Students are now able to get a F+, F, and/or an F-. In my day, an F was just an F. 
  • Hot glue works wonders when trying to decorate or hang things on your classroom walls. 
  • Vertical blinds are not my friend. I break them every time I open or shut my blinds in my classroom.
  • Central air is not all it is cracked up to be. My room is still very hot at school and I miss my large windows I could open at my previous school.
  • Saying "no" is okay.
  • Taking time for myself is extremely important.
  • Students and staff are able to help you endure a hard situation, such as losing a loved one.
  • Teaching is pretty awesome and I am fortunate to do what I love every day (I already knew this one but it is good to revisit it)

This summer however, things will be different. My husband and I purchased our first home (FINALLY!). It still feels surreal. Even as I am sitting in my half-unpacked office (I should be unpacking but everyone needs a break, right?) typing this blog post. 


I will be embarking on my fourth year of teaching. I can hardly believe it. It feels like just yesterday I was sitting in endless classes at Marshall writing lesson plans after lesson plans. I am looking forward to the new school year and I plan to be pretty busy on Pinterest in between working on my house but I am not in a hurry for summer to pass me by! 


Blog posts about the house to come soon :)

Thursday, May 15, 2014

Keep the Change!


Life is rapidly changing. As you read in the previous post, my husband and I will be closing on our first home next Friday. That is of course, if everything gets fixed in time. You know how the appraisal and inspection process goes. Little piddly things need to be fixed and such. However, I honestly have not had time to worry about any of the house situation as I have been busy wrapping up a school year, writing the last of my lesson plans, completing my evaluation goals, and packing up a house. I have been able to throw in a few crafts here and there and that's what I wanted to share with you today!


Through Pinterest, I found the cutest "Keep the Change" sign and jar for the laundry room. In my new house, I have high hopes for my large utility room. I want it to look cute even though the only thing that it will hold will be cleaning supplies and a washer and dryer. Oh well.


Materials needed for this craft:
Piece of wood cut to preferable size
Blow torch (for distressed look)
Modge Podge
Cut out letters
Stencil (if you're not cutting out letters)
Paint - color of your choice
Modge Podge
Mason Jar
Scrapbook Paper (if cutting out letters)
C-Clamp (Wal-Mart, Lowes, Home Depot, Harbor Freight, you get the point....)
Polyurethane
Sponge brush


I took a piece of wood and my friend and I distressed it using a blow torch. Well, let me say she used the blow torch and I watched. I'm not touching that thing, are you crazy?!? Then, I cut out letters spelling "Keep the Change" from my desired scrapbook paper using a Cricut. However, if you prefer to paint the letters on, you could always use stencils or paint pens if you have exceptional handwriting. I personally did not trust my "good" handwriting to last long enough and be even so I opted to cut out my letters. Then, arrange the letters the way you want and brush them on with a thin layer of Modge Podge. Make sure to measure where you want your letters in comparison to where you want your mason jar to stay. Once your modge podge and everything is dry, spray it with polyurethane to give it a shiny protective cover.Then, drill a small hole and put you C-Clamp through it to hold your mason jar.

Voila, now I have an adorable Keep the Change jar for my new utility room. Now, my husband and I just need to start carrying cash and change rather than a debit card everywhere....

Until next time, stay classy!

Tuesday, May 13, 2014

Looks can be deceiving....

Alas, it has been a while since I wrote. I had every intention of updating this blog at least twice a week but life has had other plans. I left you on a bit of a cliffhanger last post when I said I would write about the house we saw.

So, my husband and I have been house hunting for about 2 years on and off. We recently discovered a house in this beautiful neighborhood and it was reasonably priced. The only issue? There were no pictures of the inside of the house. I learned quickly why they left those pictures out. I emailed the listing agent to ask what the situation was with the inside of the house. I didn't want to waste anyone's time by looking at a house that had a zero possibility of being the one. The listing agent wrote me back with "Call me." Okay, at this point my spidey-sense is tingling and I realized there was probably a few problems with the house. I wrote them back and said, "Never mind, we were just wondering if you had access to photos of the inside of the house." The listing agent, very eager to sell the house, wrote back and told me "the house needs some work and it needs to be cleared out, the previous renters left behind a few items." So my husband and I, naive as we were, believed this to mean "there may be a few minor leaks, carpet stains, etc." We eagerly scheduled an appointment. Boy oh boy, were we in for a surprise when we went and saw the house. My only regret? Not taking any photos. I was in too much shock.

Let me paint the picture for you. My husband and I pull up to a gorgeous brick house in a quiet cul-de-sac. The house has great curb appeal.As soon as we walk in, we are greeted with a room full of junk. No big deal, they'll clean it out before we close. We kept walking. The next thing we hear? "Drip, drip, drip." We proceed to look up and see a HUGE, active leak in the ceiling. We walk further and more and more leaks begin to appear. At this point, I am trying to keep an open mind as I know I can be a bit of a perfectionist. I also think my husband can fix anything (shh...don't tell him that) so I didn't think it was that big of a deal. Well, we continue through the house and find the oddest things. You know the red fire alarms that are installed in public buildings such as schools, libraries, malls, etc? Yeah, those. Well, those were in every single room of the house. Weird, right? Then, we proceed upstairs were we find rooms that have deadbolts and chains on the inside of the doors. My husband and I do not have children yet so maybe we just don't understand needing to lock ourselves in a bedroom. Anyway, we then go into a bedroom that has pentagrams drawn all over the walls. We look out the bedroom window, into the backyard and see an actual 1970s mobile home parked in the back yard. It is dilapidated and has junk falling out the door and windows it is so crammed full! Every room in the house was packed with junk upon junk. Do not even get me started on the creepy clown collection. Needless to say, we did not make an offer on this house. This blog post, I fear, does not even do the situation justice.

However, we have been blessed and have recently found a house. We are due to close next Friday (the 23rd). This is part of the reason I haven't blogged lately. I have been busy packing up a house and purging things we do not need. It is amazing how much junk one can accumulate and believe they "need." After waiting and waiting to find the right house, God has brought everything together. We are still waiting to sign the papers but at this point, we feel everything has come together. It is definitely going to be an adventure. I hope to fill my upcoming blog posts with cheap and classy items I am buying or making for our new home and a few funny stories along the way.

Until next time, stay classy.

Friday, April 4, 2014

Wedges and Spring


Okay, so I don't know about you but I am definitely over the "polar vortex" we have been hit with this winter. Don't get me wrong, I enjoy a good snow day as much as the next teacher BUT it was beginning to get a bit ridiculous. So what better way to beat the winter blues then buy adorable and AFFORDABLE cute spring shoes? However, if you are like most of America at this time and are suffering from the economic woes, this can become a bit dicey. My husband and I have been pinching pennies to pay off debt and buy a house. Yes, we are trying to be responsible and sometimes it is difficult for this girl who loves a good shoe or an amazing top. So when the shopping bug bites, I typically hit up Gabe's or mine and my mother-in-law's personal favorite, Goodwill! If you already aren't frequenting these two stores, you should get over there!


I was driving to run an errand and thought "I should stop in Goodwill." So I looped back around and I am glad I did. I found four amazing BRAND-NEW wedges for a whopping $24! That's $6 a pair for you non-Math people, like myself. Don't worry, I took pics.


Aren't these adorable? Being a teacher, I love a good wedge because it enables me to wear heels without my feet hurting all day.


Oh and I can't forget the pair of wedges I bought at Goodwill 4 months ago and have eagerly been waiting to wear. The best thing? They were brand news with tags and only $2!


This evening has been pretty productive, not that I have finished grading my 110+ essays on McCarthyism or my Cold War Quizzes but I did complete my first yoga workout this evening. What in the world would we do without YouTube? I know yoga is suppose to be relaxing and quiet but nothing gets me in the mood to work out more than listening to Shakira and thinking of how tone she is. She is kind of my inspiration, don't judge me.


The large amount of papers I need to be grading as I type this. I'm going. I really am, I'm just waiting for my Bagel Bites to finish cooking.


Oh and a shout out to the NSA in the event they are breaking privacy laws and checking out my cell phone now as I type this on it because I am too lazy to head to my computer. I did put this beauty on my car this evening. Is it 2016 yet? #StandwithRand2016


Stay tuned for a post about my husband and my adventures in house hunting...it'll be a doozy.